Vault Screen
Import and Manage addresses via the Polkadot Vault iOS and Android application.
No Imported Accounts
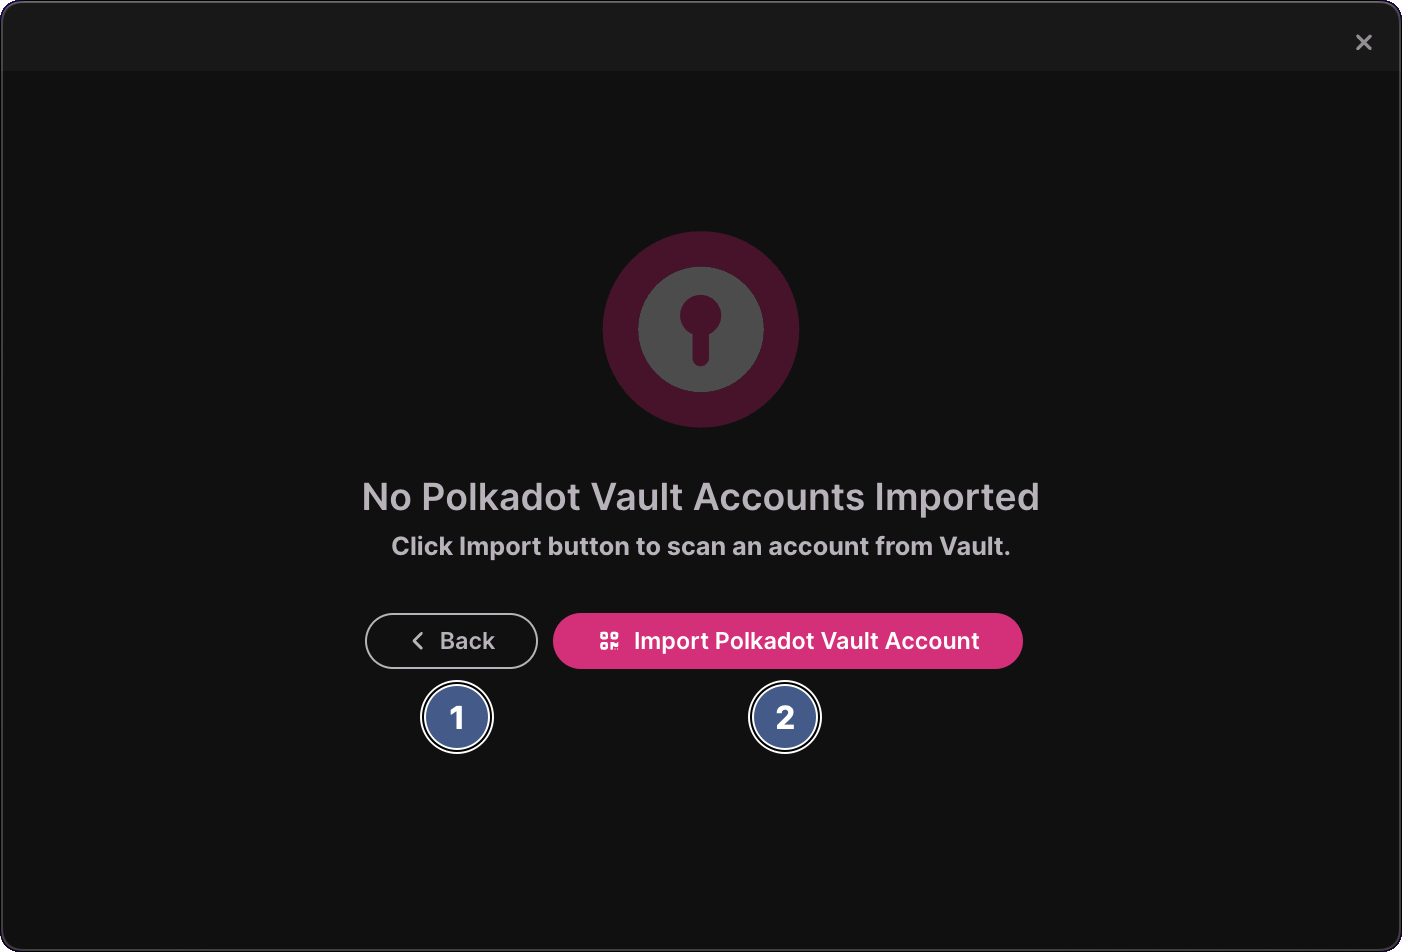
The following screen will be displayed if you have no accounts imported using the Polkadot Vault application. This screen will present a simple UI to import a new address using Polkadot Vault, or go back to the home screen.

1. Back button
Click this button to return to the Home screen.
2. Import button
Click this button to enable your computer's camera and receive camera feedback in an overlay. After your camera has been enabled, follow these steps to import an address managed by Polkadot Vault:
- Open Polkadot Vault on your mobile device and select an address QR code that you wish to import.
- With the QR code being displayed on your mobile device, hold it next to your computer's camera and make sure the entire QR code fits within the camera viewport.
- Polkadot Live will automatically detect the QR code and derive the associated encoded address.
- The camera overlay will close and Polkadot Live will process the address accordingly.
The new address will be listed on the Vault screen, as well as under the Subscriptions tab in the main window. From here, you can manage subscriptions for the address.
Imported Accounts
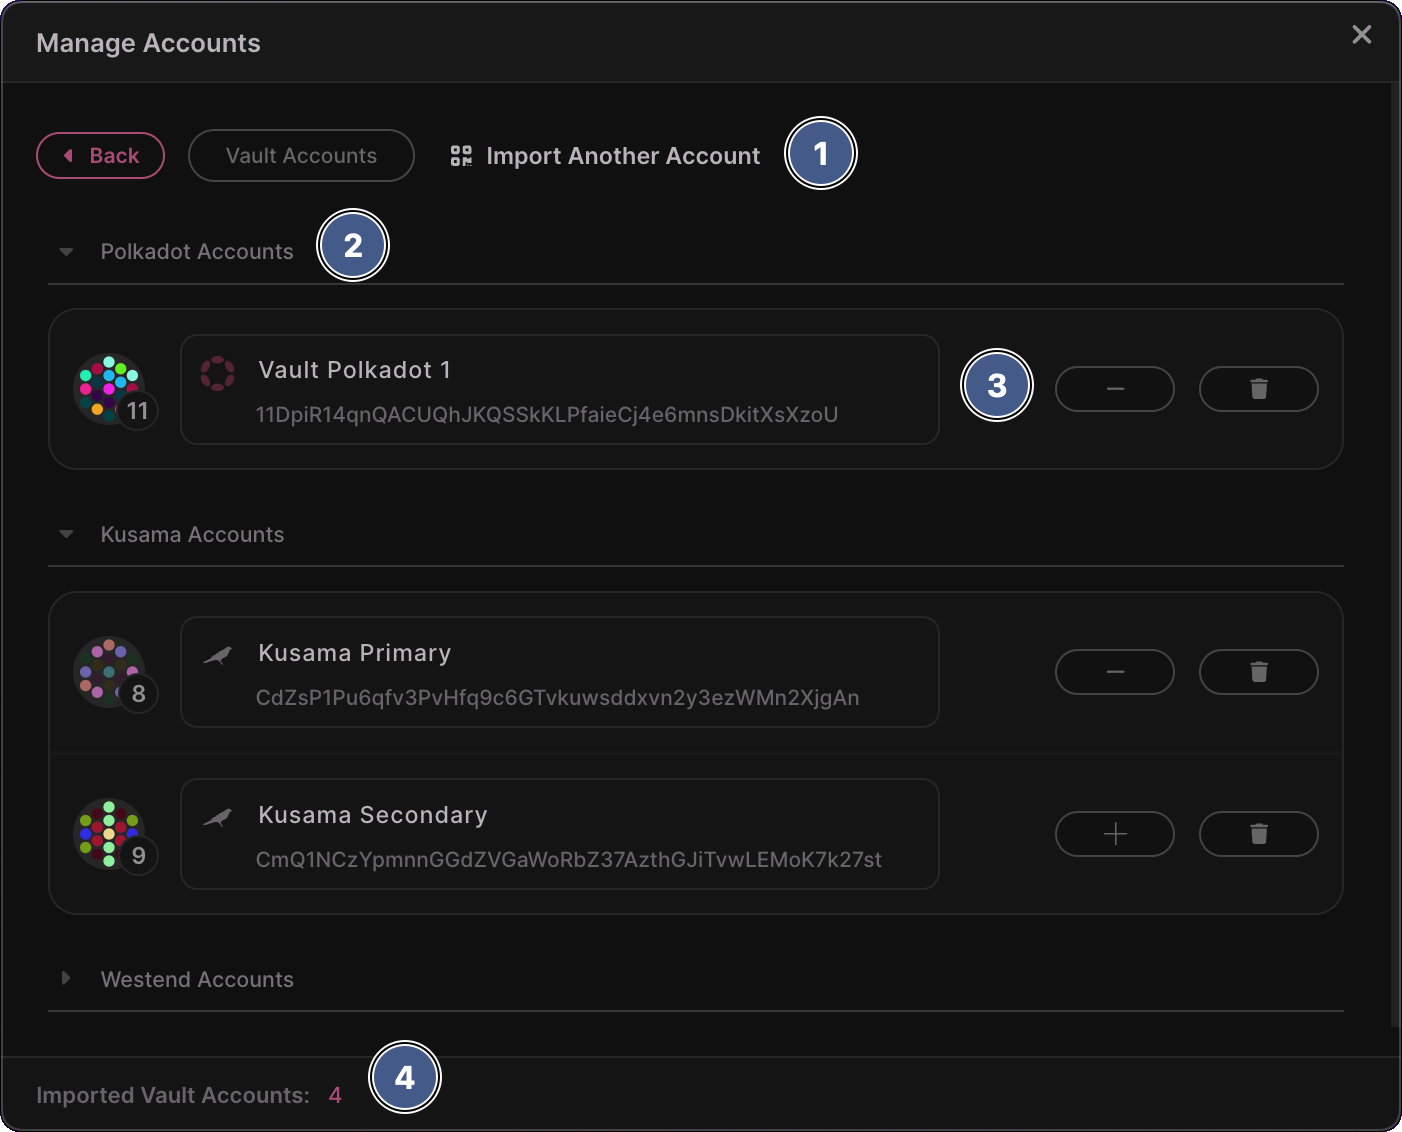
The following screen will be displayed if you have one or more addresses imported using Polkadot Vault. Use this screen to import more accounts with Polkadot Vault, and manage existing accounts.

1. Header
The header displays the following items:
-
Back Button
Return to the accounts window home screen. -
Vault Accounts
Label identifying which accounts screen is being rendered. -
Import Another Account
Click this label to open the camera overlay and import another address using Polkadot Vault.
2. Account groups
Accounts are grouped by their respective network and listed in alphabetical order using the account name. Account groups can be collapsed and expanded by clicking on its header item. Accounts groups will be displayed in the specific order of Polkadot, Kusama and finally Westend.
3. Account row
Each imported address is represented by an account row containing the following items from left to right:
-
Polkicon
A uniquely colored polkadot-themed icon where colours are derived from the address itself. -
Address Input Field
Displays the account name and its associated address below. By default, the account name will be a truncated version of its address. Simple click on the account name, type a new name followed by pressing the Enter key to update it.infoAfter renaming an account, Polkadot Live will automatically update event items and associated account data in the main window to reflect the new name. You can rename an account that has active subscriptions and associated event items without worrying about account names becoming out of sync.
-
Add / Remove and Delete Buttons
Add: The account data is sent to the main window and a new entry is added under the Subscriptions tab.Remove: The account is removed from the main window's Subscriptions tab and any active subscriptions associated with the account are turned off.Delete: completely remove the account from Polkadot Live. You will need to re-import the account in order for Polkadot Live to use it for subscriptions.
4. Footer
Displays the total amount of imported Polkadot Vault accounts.